Monday, 8 April 2013

The Cheeseburger Birthday Cake

Despite my job as a chef I hold my hands up that I never really baked with my boys when they were small, so it delights me now that my 15 year old is interested in baking cakes for family and friends birthdays. This week he was attending a 40th birthday meal for a lady he works with and found a tutorial on you tube for a cheeseburger cake that he wanted to attempt to make.
For years, when the boys were small, I made numerous novelty cakes for their birthdays but none as easy and yet so effective as this one so I thought I would share some photos with you.

First he made a basic vanilla sponge mix and split the mix between  2 7ins round cake tins and baked them. He also made a chocolate fudge cake in another 7ins cake tin (sandwich tin) .
Making The Sponge
After cooking he allowed the cakes to cool on a wire rack.
Cooling The Sponge
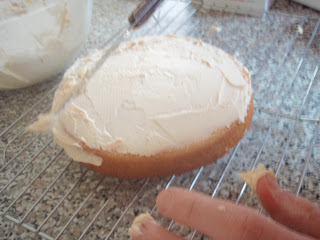
When cooled he made some butter icing. It needed to be a beige colour and, as butter icing usually has a dash of milk in, I suggested he slightly warm that milk first and soak a tea bag in it, to release a brown colour, then add to the icing. It worked! He covered one of the vanilla sponges with the icing to form the base of the cake.
Icing The Base
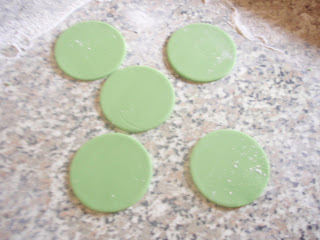
Using a pack of mixed coloured fondant icing that I had bought him he rolled out the green and cut out 13 small circles.
Green fondant Circles
He folded, and roughly crumpled the edges, and then stuck into the icing around the edge of the cake base.

Adding The Lettuce
 Once the circle of lettuce is formed he placed the fudge cake on top, rolled out the yellow icing and cut 4 large triangles and stuck on top of the fudge cake with the butter icing.

Looks just like cheese!
Then he rolled out the red icing and cut out 4 circles for tomatoes and placed on top of the 'cheese'.
Looking tasty with tomatoes and cheese
Time then to put the last of the icing on the 2nd vanilla sponge.
He spread it over the sponge, covering the sides also.
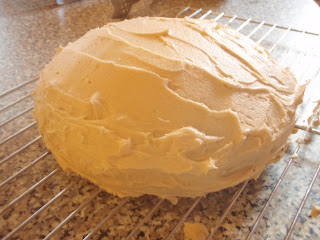
Icing the cake top
He made some tiny white balls of icing and pressed them into the top sponge.
Fondant Sesame Seeds on the Cake
Then, gently together, we transfered the top sponge to sit on top of the fudge cake.
The Completed Cheeseburger Birthday Cake
How easy was that!!!!
Apparently it took him a while to convince everyone at the meal that he had made it himself but all guests thought it was brilliant, especially the birthday girl!
The completed cheeseburger birthday cake.
Many thanks for popping by, now head over with me to Handmade Monday to see what other crafters have been up to this week. Have a great week.

Monday, 1 April 2013

Secret Easter Bunny Craft Forum Swap

Well hello. Long time no see!
 A year infact has passed since I was last on the dreamstar diary blog and what a year it has been. Unfortunately my job took over my whole life last year not leaving me with much time, or even inclination, to get my sewing machine out and create. Now, having changed jobs a couple of months ago, I am a much more relaxed and happier person and maybe, just maybe, that little sewing spark will relight in the not too distant future.
 I have, however been creative in other ways, and on my other blog 'Styles Of Cooking' you can see I am doing food challenges and, at present, have almost finished my first challenge of making 15 bread recipes in a month.
 But back to sewing and despite not having done any for a year I still have a daily read of the threads and posts on the craft forum and when sign ups for the secret easter bunny annual gift swap came up I decided it would do me good to sign up again.
I felt quite honoured this year to have Karen 'BeadsByDesign' as my gifts recipient. She annually hosts the easter and christmas forum swaps and puts a lot of time into doing it so I knew my gift needed to be extra special for her.
It's great doing a forum swap as it makes you go on a snooping mission to discover as much about the person as possible. From Karens blog 'Creative and Faithful' I found she was a lover of the sea and beach and of the driftwood and broken pottery that can be found there. So the beach became my main focus for my gift. Having chosen the idea of putting a beach theme on a cushion I first put my ideas down on paper.
First I drew a house. 
Then I added sun, birds, a beach sign, shells and words.
Using my drawings I cut out fabric pieces from all my scraps and sewed them together. I found some lovely little shell design buttons on ebay to sew on too.
I added the words and then, after a quick visit back to Karens blog for colour inspiration, decided on a blue polka dot fabric for the main cushion colour.

.
And here it is!!!!
I am so pleased with the finished product. Infact I may make myself one too.
It's easy to get so carried away designing your own gift that you forget that you actually get to receive a gift too! For me this year my received gift was extra, extra special as it was from a lovely lady that I have admired, and also been slightly in awe of, for the past couple of years. I love her work, her blog, her tutorials, infact everything about her!!
Ros didnt disappoint and she made me these beautiful bunnies 'Pip and Squeak' that I will put somewhere very special and treasure always. You can find more about Ros on her blog rosmademe.
I have decided to enter this post into Handmade Monday over on Handmade harbour blog  for the first time in months. It will be nice to enter back into the world of handmade and see what I have been missing out on for ages| And if you are interested in making bread dont forget to pop by other blop 'Styles Of Cooking' and maybe attempt a few of the recipes.